
- This article walks you through the different phases of a successful Point Cloud to Revit model Conversion project for a chain of café outlets, starting from client onboarding to the final deliverables.
- The objective was to transform laser scans and photographs of the café into precise 3D Revit models, for accurate visualization of the current structures and facilitating informed renovation decisions.
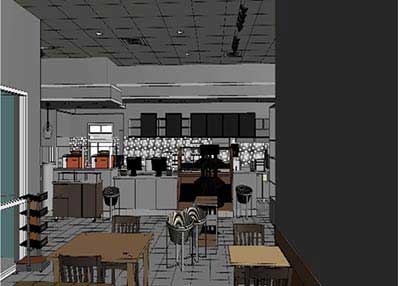
- Hitech delivered precise 3D Revit models, with a tolerance of +/- 10 mm, made possible through structured and seamless processes, rigorous quality checks, and consistent updates.
Point cloud to BIM has revolutionized workflows for surveyors and surveying companies, making it indispensable to the AEC industry. By converting laser scans and photographs of as-built conditions into accurate 3D Revit models, it empowers stakeholders to visualize existing structures and make informed decisions with precision. Scan to BIM technology amplifies efficiency and reduces errors, transforming the way projects are executed.
This article provides an insightful walkthrough of one of our successfully accomplished Point cloud to Revit modeling projects, highlighting the crucial stages and challenges encountered, and the tools and techniques employed to overcome them. Join us as we explore the journey from project initiation to final deliverables.
Walkthrough of a successful Point Cloud to 3D Revit model conversion project
Picture this:
A leading chain of coffee outlets in the USA, a renovation roadmap, and the need for highly accurate 360-degree visualizations of 200+ running outlets. There was no way you could suspend operations of the coffee shops or control their customer rush. Point cloud to Revit modeling and meticulous digital reconstruction of the structures was the only way to know how to plan and carry out the renovations. That’s where we came in.
The client:
Our client was a leading surveying company offering survey, design and construction management services to a global clientele. They were well-versed in techniques and technicalities and used the latest equipment to capture as-built conditions, from scanners to in-house cameras to drones. They worked regularly with multiple point cloud conversion companies.
Onboarding and project initiation for converting Point Cloud to a Revit 3D model
The first meeting
The initial meeting involved understanding and listening to the client’s unique needs, expectations, and the project outcomes they desired. Once the team of BIM experts at HitechDigital understood the business need, they defined the scope of work (SOW) & Level of Detail (LOD) requirement. Together with the client they agreed on the deliverable formats, the required building elements and non-geometric attributes.

Download Point Cloud Scan to BIM Scope of Work Checklist
Project assessment and documentation
Once the team defined and documented the scope of work, benchmarks against key project metrics including the permissible tolerances, deliverables, delivery schedules, reporting cadence and other control mechanisms were set. We also decided on communication channels and protocol. We agreed upon people who would act as dedicated points of contact (POCs) for the point cloud to 3D Revit modeling project. We created an in-depth project plan with timelines, roles and responsibilities and other details.
The client showed us photographs and scans of everything, but there were also gaps that had to be reconstructed by extrapolation. Our team of experts carefully understood the client requirements and made them aware of the data gaps that needed to be covered by engineering projections and validations.
Further understanding challenges
In the next two meetings we fine-tuned project scope and deliverables, including LOD, the tools to be used, the model and mesh parameters, documentation standards, file formats, project benchmarks and milestones. Most importantly, we agreed on project budgets and deadlines.
The primary challenges in the work that we discussed with the client included:
- Inaccuracies in point cloud scans of complex interior retail store areas
- Multiple scans of the same area had a huge mass of redundant data that needed to be weeded out, though multiple scans increased representation accuracy
- Many of the areas that needed to be covered in renovations did not have scan data as they couldn’t be scanned and calculated modeling was needed
- There were multiple projects but the turnaround time was just 16 weeks
Zeroing in on software, tools and platforms
For this project, we agreed on using BIM360 for design collaboration, Revit for 3D modeling, Autodesk Recap Pro for point cloud processing, and Navisworks for viewing and clash detection. All of these industry standard tools share the same Autodesk ecosystem for maximum compatibility.

The Point Cloud to 3D Revit modeling project moves to implementation
Data acquisition and pre-processing
For this coffee outlet chain project, the client gave us raw point cloud data captured through LiDAR scans, 360-degree photographs, CAD drawings and other reference images. We first processed the point cloud data removing noise and redundancies to create a clean usable dataset for BIM modeling.
Register and align point cloud data
We then imported the point cloud data into Autodesk Recap Pro, combined and aligned multiple scans for a complete representation of target geometry and spaces, using multiple reference points to validate the alignment accuracy.
Remove noise, optimize and verify coordinates
In the next step, we carefully removed all irrelevant data points, noise, occlusions, and clutter to increase the quality of the point cloud. We then verified the coordinates of the point cloud again to prepare it for accurate insertion into Revit.
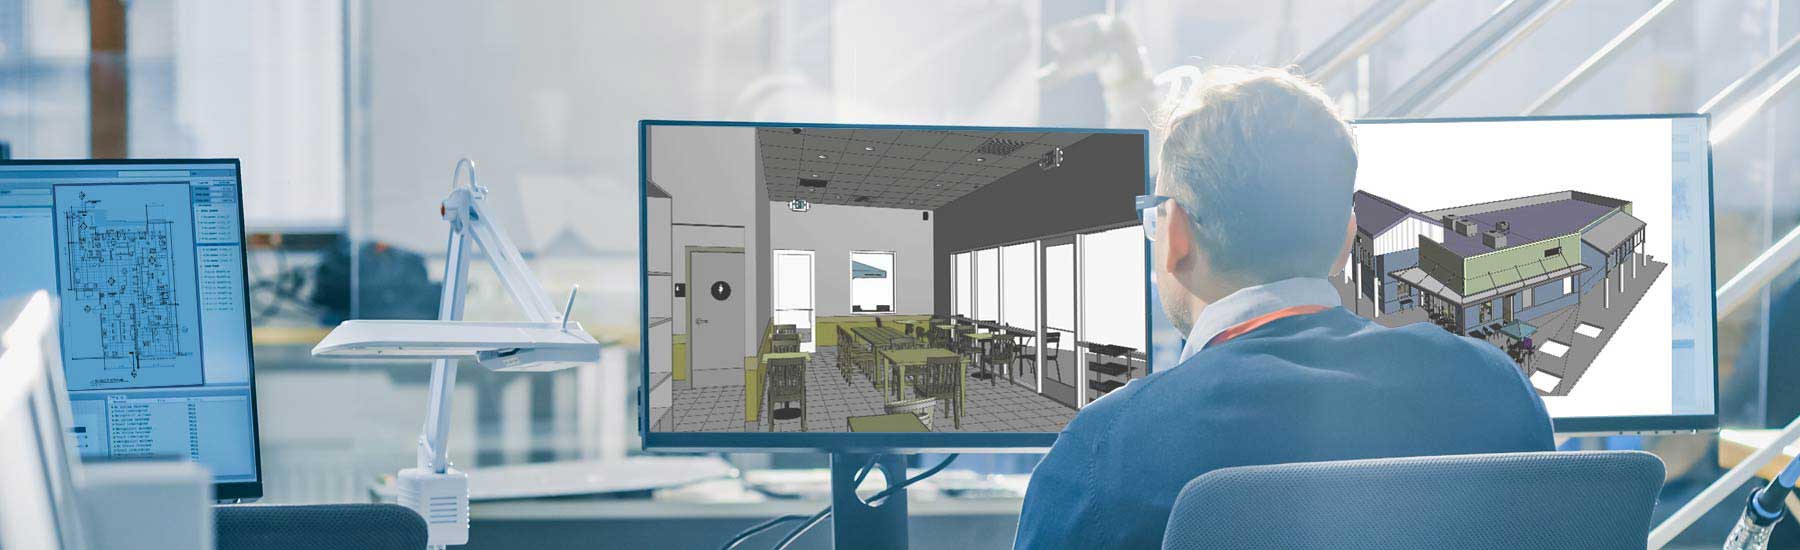
Point cloud to 3D Revit modeling
After the point cloud files (.rcs) were ready for insertion into Revit, we did a final check with the client and raised a round of RFIs before proceeding to model with supplementary input provided by the client in the form of photographs, CAD drawings and others.
Setting up the project and modeling
We inserted the processed point cloud data into Revit and defined the coordinate systems needed for accurate modeling. Once the project was set up in Revit, we utilized other supplementary information like the CAD drawings and 360-degree photographs to provide additional details and context. Then we created reference planes to align the point cloud data with the coordinate system of the project before starting to model.
Filling in the gaps
Wherever there were gaps in data, our engineers calculated and extrapolated missing dimensions and data based on experience and supplementary material.
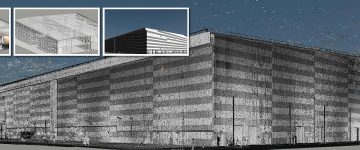
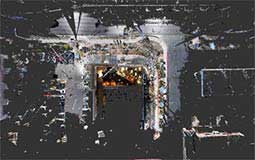
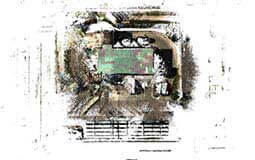
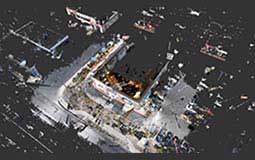
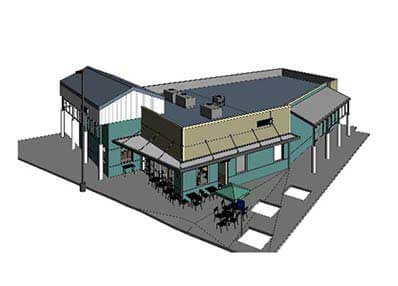
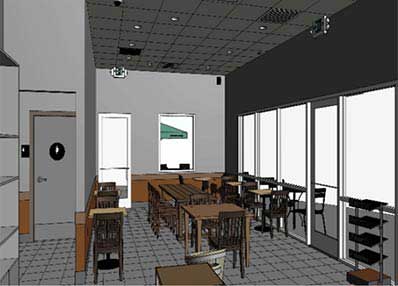
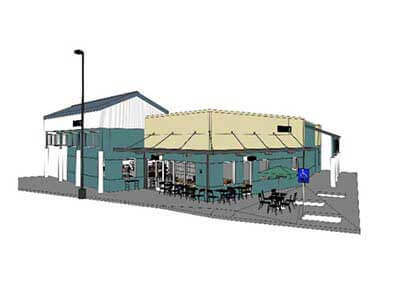
 Point Cloud to Revit As-built Modeling Process
Quality checks and verification
Clash detection, validation, and refining
After the models were ready in the first round and LOD was adjusted, we performed clash detection both in Revit and in Navisworks to identify and resolve all clashes and interferences. Then we validated the models by comparing the Revit model against point cloud data and supplementary information like 360-degree photographs to ensure the model accurately represented the as-built conditions at the site. We used section views within Revit to check for deviations, and checked that all no-geometric attributes, such as properties and materials were properly represented in the model.
We also assessed in detail the accuracy of individual elements like MEP components, walls, roofs and floors to ensure they match the point cloud data and other information.
Internal review with project team
Before sending out the models for review by the client team and their feedback, we first thoroughly reviewed the models in house for accuracy. The project teams went through the models and reference material to spot errors, inconsistencies, and areas of improvement.

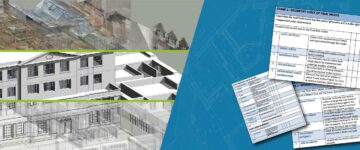
Download detailed Point Cloud to BIM QA/QC process

Client review, feedback, iterations and refinement
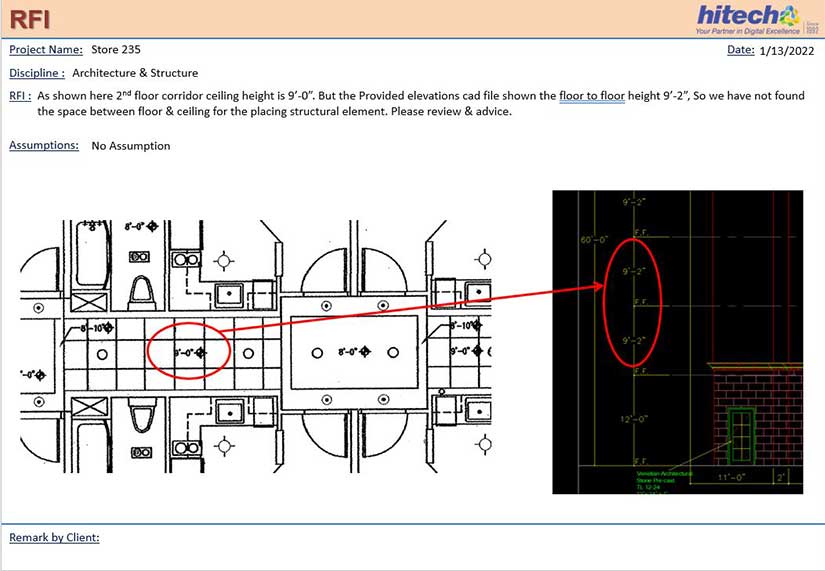
Client review for us is a continual and scheduled process of collaboration, with updating and clarifications. This helps to keep the project on track without any information gap. Client feedback was taken during the point cloud to 3D Revit model development for iterations and refining as well as during our scheduled monthly governance calls. Regular RFIs helped us to generate accurate dimensions for low-density scans.
Once our internal quality check was completed, we sent the 3D BIM model to the client for approval. This usually takes a few ups and downs, because clients can mark things or visualize discrepancies only after a detailed model has been prepared. Based on client feedback, the model is further refined till the client is satisfied with the model on all aspects.
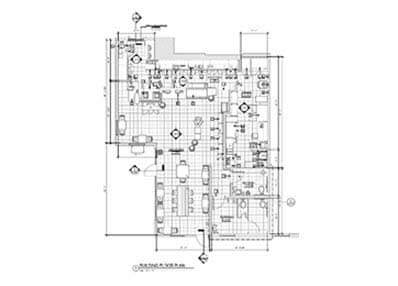
Once the model got final approval, we proceeded to create documentation, drawings, cross-sections, floor plans, elevations, site plans and other construction drawings that could be derived from the model and needed by the client.
Project monitoring and coordination
Regular scrum calls helped the team discuss updates, challenges, and next steps. They also helped in aligning efforts and addressing bottlenecks.
We also ensured that there was regular tracking of progress against pre-defined metrics which included number of point clouds processed, timelines, accuracy levels achieved etc. Analysis of the collected data and metrics helped us identify trends and patterns while providing valuable insights into project performance. Based on the analysis, appropriate action was charted which involved adjusting workflows, providing additional training or resources, or implementing corrective measures to enhance efficiency and productivity.
These project monitoring steps ensured transparency, accountability, and continuous improvement throughout the execution of the Point Cloud to BIM project.

Download Point Cloud to BIM Project Monitoring Report
Final deliverables and post-project support
We delivered everything the client wanted from the project including the as-built coordinated BIM models and construction drawings. We did this within 16 weeks.
The final deliverables included:
- As-Built Point Cloud to 3D Revit model at +/-10mm accuracy
- As-Built drawings with elevations, floor plans, site plans, roof plans, cover sheets, and sections
Continuous improvement
HitechDigital went above and beyond its initial scope of work and provided suggestions to the client on how to automate their processes and workflows using customized plugins and algorithms. Real-time collaboration on cloud-based platforms like BIM 360 helped take communication and collaboration to an all-new level making the data accessible to a broader range of stakeholders.
Wrapping up….
So, now you’ve had a brief walkthrough of our Point cloud to BIM modeling process at HitechDigital through a real project experience. In a project like this, it’s more than offering the service, but about giving the client a smooth experience. We know what we are doing, and that gives our clients confidence, because they get results.
Backed by 30 years of expertise, HitechDigital commands an impressive portfolio of 1,000+ successful BIM projects for clients across the United States, United Kingdom and Europe. Our team of over 200 BIM experts diligently strives to transform and expedite engineering and business processes.
So, if you are thinking about creating 3D Revit models from point cloud data, contact our BIM experts.